Create and host a WordPress blog on Azure for FREE

Many people are looking for building their own online blog.

One of the very popular online blog engines or websites, that had gained a lot of traction in the past, I would say 10 to 15 years, is WordPress.

People like WordPress because there is a huge community of developers, content creators around WordPress and because it’s open source. There are also a lot of plugins, a lot of themes and a lot of integrations with other services (payment gateway, cart, SEO …etc.)

You can even have an online store (e-commerce website) built on top of WordPress with free plugins. I think WordPress is pretty cool.

We at FaceGraph, have used WordPress to build our online store [https://shop.facegraph.com] that sold thousands of dollars of our products online and pretty much costs us 2 hours to setup!

The problem now is not the cost of WordPress itself since its open source, it is the cost of hosting WordPress. One of the things I liked in the past is the ability to host a WordPress website in the cloud for free. And to be clear, I am talking about the Microsoft Azure cloud.

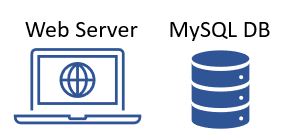
WordPress consists today of two main components, the web server and a database which runs on MySQL.

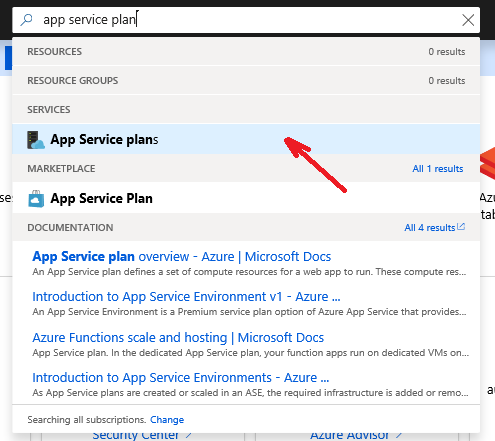
In the past, if you have used Microsoft Azure. You were able to create an A WordPress blog using the Microsoft ‘WordPress’ listing in the Azure marketplace. That allowed you to create an app service plan to host the web component and more importantly also host the MySQL database in the same app service.

Unfortunately, that option is no longer available. If you go check the Azure Portal marketplace today, you will find there is only one title by WordPress “WordPress”. And there are many other word press titles by other companies.

The WordPress listing allows you to create a WordPress blog for free, which is very convenient. However, it will basically create a new app service plan and it will also create a standalone Azure MySQL instance.

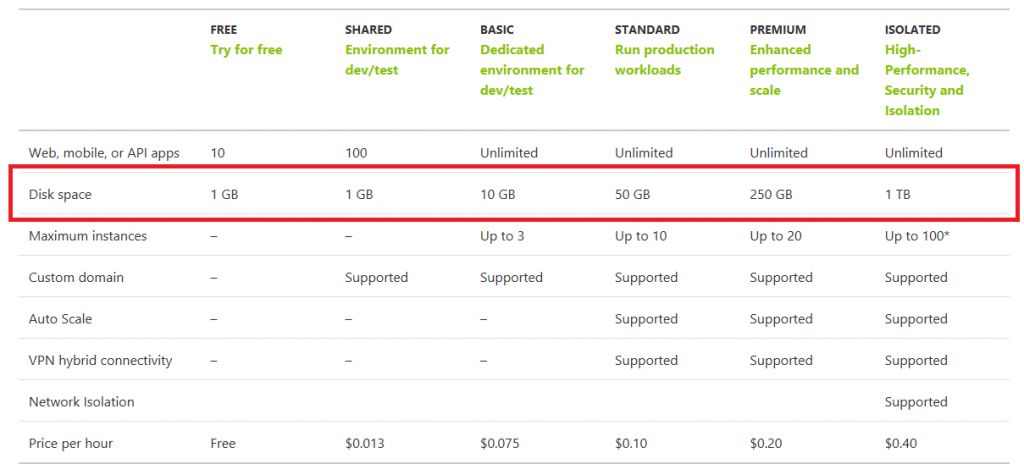
This setup might be good for production, heavy load, performant website. The cost of the hosting this setup will be about $146 a month.

Estimated hosting cost for the current WordPress deployment on Azure

That might be hefty for someone who’s looking for an economical option.

If you want to have an economic option, an option to host a lightly accessed blog {like this one for instance 😊}, you may not want to consider a different option.

The solution

The solution to that is to use this ARM template WordPress on App Service with MySQL In App (microsoft.com) by Gerardo Saca.

This arm template will allow you to deploy the old WordPress title where you can have an Azure app service created uses the free tier by default and also have the MySQL database instance created in app.

The two Azure resources that get created after deploying WordPress using the ARM-Template
MYSQL instance that is hosting the WordPress blog content hosted in App inside the App Service

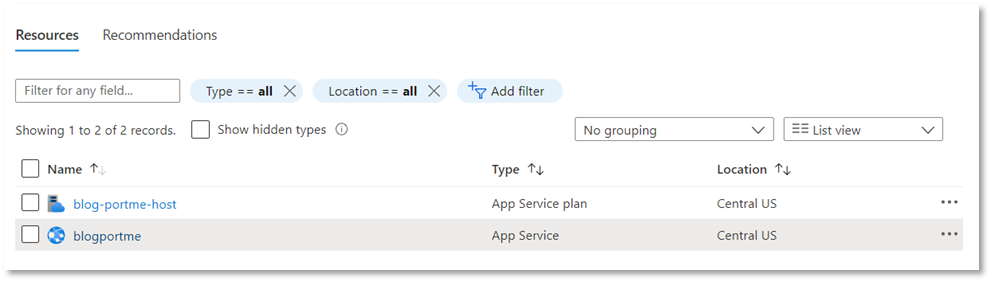
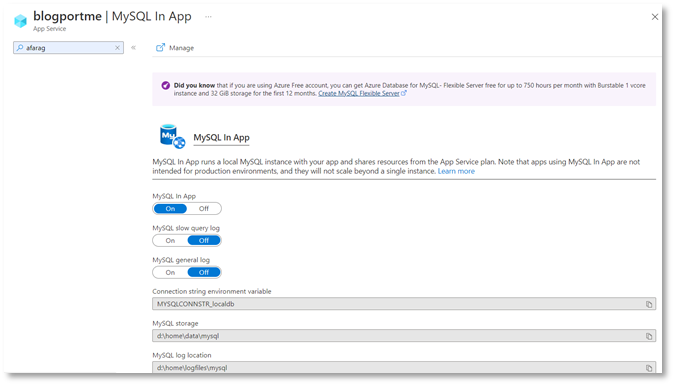
At the end of the day, you basically can pay nothing for hosting your WordPress website as you used to be in the past.

Obviously, needless to say this is not really an ideal setup for production. You bear the risk of losing your database without redundancy, the performance will also be impacted since you share the App service plan resource between the website and the database. However, it’s a good cheap option, it works and takes 5 minutes to setup!

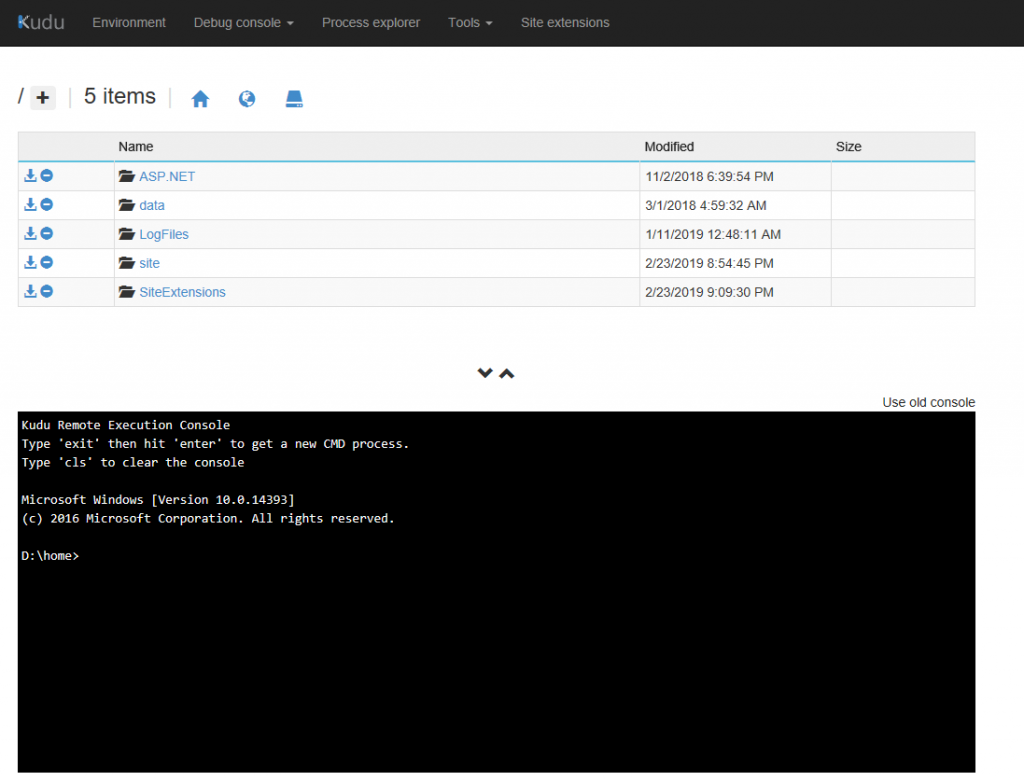
To be a good citizen of Azure, and follow your whatever governance and naming convention you may have, I would strongly recommend you to edit the template before your deploy it, locate the following two variables and updated them with your own desired name for the app service plan as well as the web app service name:

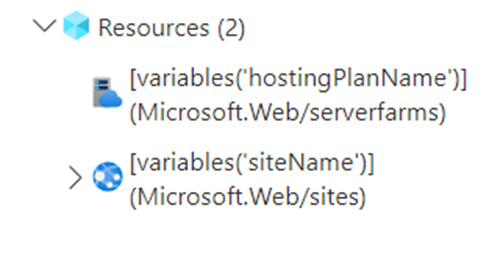
For instance you can change them from this:

To this:

Lastly, one of the things you will want to do in your WordPress blog is to change the look the appearance. You probably will look for existing themes or maybe try to import a new theme.

Check this website. https://elements.envato.com which has a huge library of electronic marketing assets and great themes for WordPress.

One of the things you’re going to face when you try to import a theme that has a lot of graphics especially if it’s big say around 10-15 MB is a problem importing the theme zip package.

You will get an error message like this:

“the page was not displayed because the request entity is too large.”

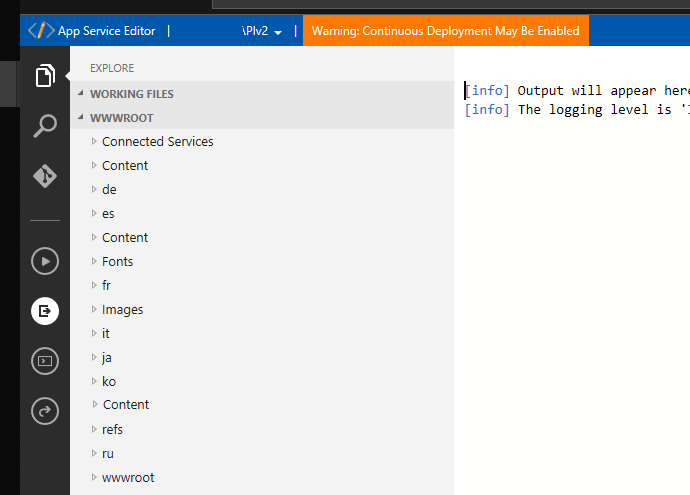
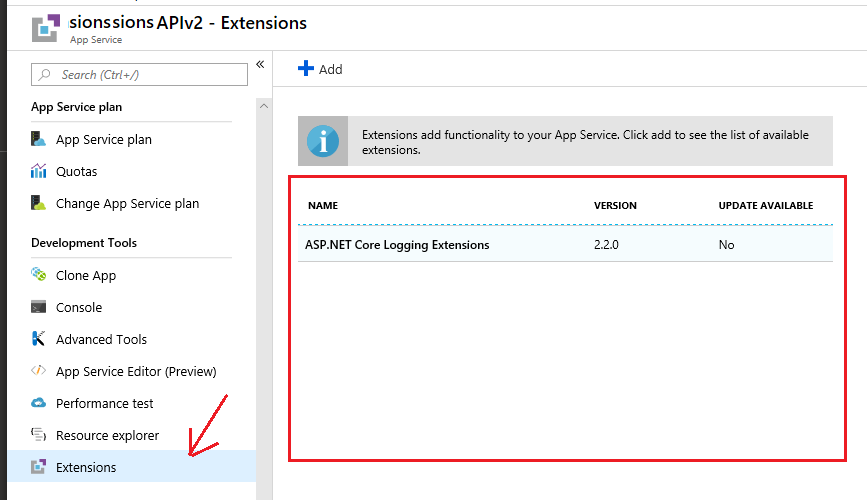
To fix this issue you have to change the settings of your web server to allow larger requests. If you have hosted your application on a Windows based app service. This is how you fix it. You add this configuration in the web.config:
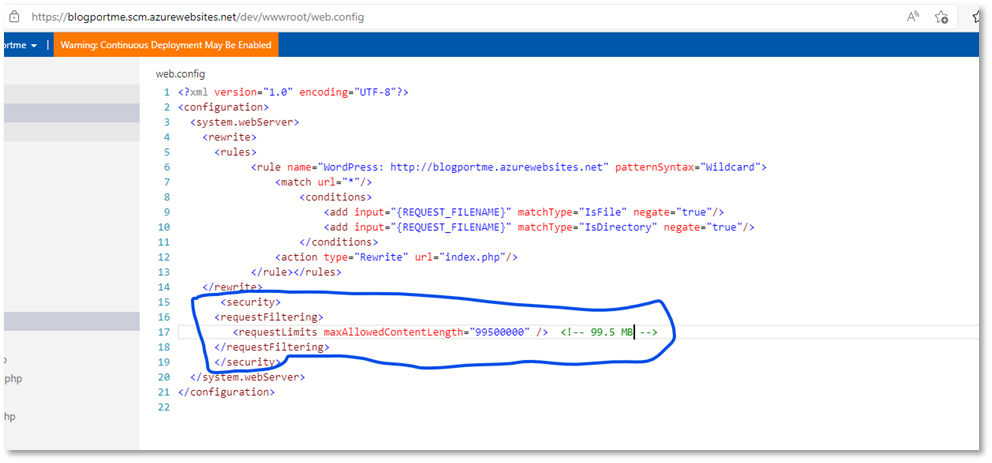
New configuration added to the web application configuration to allow larger content requests
  <security>
  <requestFiltering>
     <requestLimits maxAllowedContentLength="99500000" />  <!-- 99.5 MB -->
  </requestFiltering>
  </security>   

I hope that in-app hosting of MySQL continues to be available as it saves a lot of money (in this case 100% of cost) for hosting a WordPress blog.

The question now is, can you do this in AWS?

Azure App Service Storage

Each app service storage tier provides a specific storage quota to use for hosting your app artifacts (code, media assets … etc.).

If you are using the smaller tiers (Dev\Test) you will be sensitive to storage limits more than higher tiers (production and isolated) but this also depends on your application.

At the time of writing this article, this is how much storage you can get per tier:

Azure App Service tiers – Storage options

For more information and the latest quotas and prices go to:

https://azure.microsoft.com/en-us/pricing/details/app-service/windows/

Some applications use the web server storage to store temp files that gets generated in the lifecycle of the web application. In a lot of scenarios, it would be better to use a different type of storage away from the web server but in certain cases it makes sense. Either way, I’m not going to touch on this topic in this article but I wanted to highlight that if your application is writing files to the webserver – in this case the app service in Azure – make sure you clean them up periodically.

 You don’t want to run out of storage in your app service, you also don’t want to pay for a higher tier just because you cannot keep your storage under control.

Other than your code being the main reason to periodically increase the size of your app service there are other things that can cause this to happen too, some are obvious, and some aren’t.

In this article I will highlight some of the potential contributors to storage increases in Azure app service and how to get that under control.

Before we go there, its good to know few important basics.

Each app service is hosted in an app service plan. Think of the app service plan as a virtual web farm that hosts your code. The app service is your application virtual folder (e.g. wwwroot folder).

That means if you have multiple app services hosted on a single app service plan, all the app services will share the allowed storage for that app service plan.

How much storage is my app consuming?

First thing you usually need to know to be able to address a storage problem, is where you stand in terms of storage. How much storage your apps are consuming from your app service plan allocated storage.

I find the best place to see that information is to browse to the app service plan itself from the Azure portal. Here is how:

Go to https://Portal.Azure.com

Type “app service plan” in the top center search box then select App Service plans under Services:

Search for App Service plans in the Azure Portal

Then select the app service plan in question. From the menu of the app service plan select File system storage under Settings

This will give you a nice graph that shows everything you need to know:

App Service Plan – Storage consumption

Now you know exactly which app is consuming what under your app service plan.

What to watch out for

What are the things that you need to watch out for that might be silently increasing your storage?

Here is a list:

  1. Your code! We talked about this above.
  2. Old packages from prior deployments (especially if you are building a single page web app SPA)
  3.  Old binaries that are no longer needed
  4. Localized binaries for languages your app doesn’t support

First thing is to get the items listed above under control.

Secondly, make sure you don’t have anything in your build or deployment process that might be inflating your storage for no reason. For that, I will provide two common tips to make sure your continuous deployment (whether its automated CD or manual) doesn’t contribute to the storage problem.

If you are using Visual Studio to publish your code, edit the publish profile settings and make sure to select Remove additional files at destination under File Publish Options under Settings

Publishing Web App from Visual Studio – Remove additional files option

This will ensure to delete any unwanted files in the app service storage that is not a product of your new build. Obviously, if you are not the developer of the app, you may want to check with the developers responsible of the application to make sure they’re not creating some content on the app service needed by the app outside the build process since this option will remove that content and potentially break the app logic. The odds are the person deploying the app using VS will be the developer 😊

If you are working on a more mature project and use a CD tool like Azure DevOps to do continuous delivery for example, make sure to implement a task to clean up the app service storage before deployment. That can be done in Azure DevOps native App service deployment task with a setting (if you use Web deploy):

Under Additional Deployment Options | Select Publish using Web Deploy | then select Remove additional files at destination

Azure DevOps pipelines – Remove additional files option

Cleanup

What if your app service is already taking too much space and you want to clean it up manually. There are multiple places where you can do that at:

  1. Browser: Navigate to the Azure portal and go to the app service in question, under Development Tools

Navigate to App Service Editor (Preview) which will take you to the following URL https://[App_Service _Name].scm.azurewebsites.net/dev/

App Service Editor – Manage files

Or navigate to the Kudo portal (Advanced Tools) which will take you to the following URL

https://[App_Service _Name].scm.azurewebsites.net/

Azure App Service – Kudu portal

From there you have few options:

UI, go to Tools | Zip Push Deploy

This gives you a nice UI to navigate through your app content, delete and add files …etc.

Kudu – Manage files

Console Debug console | PowerShell

Kudu Portal – PowerShell

If you are an old DOS dude like me you can go to Debug console | CMD

Kudu – Command Line

In all the above web methods you will be able to browse your web app content and delete any files as needed.

2. Thick client or IDE, you can do the following in Visual Studio:

Open the Server Explorer, connect to your Azure subscriptions then browse your App Service plan | app service files:

Visual Studio – Server Explorer

3. Use your favorite FTP client with the app service SFTP credentials

App service is still too big after deleting my code

One thing that some developers may run into, is that the app service size doesn’t go down as they delete all their deployment code. There are other things that may contribute to the size of your app service but not necessary part of your app code. This is what I call none-obvious stuff, one of the most common would be site extensions.

You may have a few site extensions installed in your app service that are not being utilized and that is what is consuming a lot of your app service storage. For example, the .NET Core 2.2 libs are big, they can be about 300 MB per version.

To find out which extensions are installed, navigate to the Azure portal and select the app service in question then go to Extensions | under Development Tools:

Make sure you don’t have any unwanted extension

App Service – Extensions

Hope that helps